
Nano Banana 2 and Nano Banana Pro are now available on PWZ, giving you two ways to create images from text and edit existing visuals with references. Build promotional graphics, refine product photos, or prepare a starting frame for your next AI video.
Here’s how to choose a model, write a useful brief, and turn a promising result into an asset you can use.
TL;DR
Start with Nano Banana 2 to explore ideas and make frequent revisions. Consider Nano Banana Pro for demanding compositions, reference-based edits, and detailed visual requirements.
Both model pages on PWZ offer image generation, image editing, and output up to 4K. Choose by the task rather than assuming Pro is necessary for every image.
Give each reference a clear role, specify exact wording for graphics, and check the result against your original brief.
Once your image works, use it as input for a PWZ image-to-video workflow and describe the movement you want.
Introducing Nano Banana 2 and Nano Banana Pro
Two models. Different creative priorities.
Nano Banana 2, also known as Gemini 3.1 Flash Image, focuses on fast image generation and editing. It is a useful starting point for exploring compositions, trying visual directions, and making everyday creative revisions. Text rendering and reference-based work are also part of its capabilities.
Nano Banana Pro, associated with Gemini 3 Pro Image, is positioned for more demanding image tasks. Consider it when your brief combines specific object placement, detailed typography, multiple visual references, or precise creative instructions.
Both create and edit images. The distinction is where you choose to spend your effort: exploring possibilities quickly or tackling a more complex brief.
Choose a Model for the Image You Need
Start with the task, then choose the model.
Use this Nano Banana 2 vs Nano Banana Pro comparison as a starting guide, not a fixed ranking.
Your task | Suggested starting point | What to check |
Explore styles and compositions | Nano Banana 2 | Does the direction fit your brief? |
Create a graphic with exact text and several layout rules | Consider Nano Banana Pro | Wording, hierarchy, and placement |
Edit an existing product or portrait | Choose according to the complexity of the edit | Requested changes and preserved details |
Prepare an image for video | Either model | Framing, subject clarity, and room for motion |
A straightforward background change does not automatically require Pro. Likewise, a higher-resolution image will not fix an incorrect layout.
First identify what is wrong, then decide whether to change the prompt, references, settings, or model.
Create Promotional Graphics with Clear Text and Layout
Give every element a job.
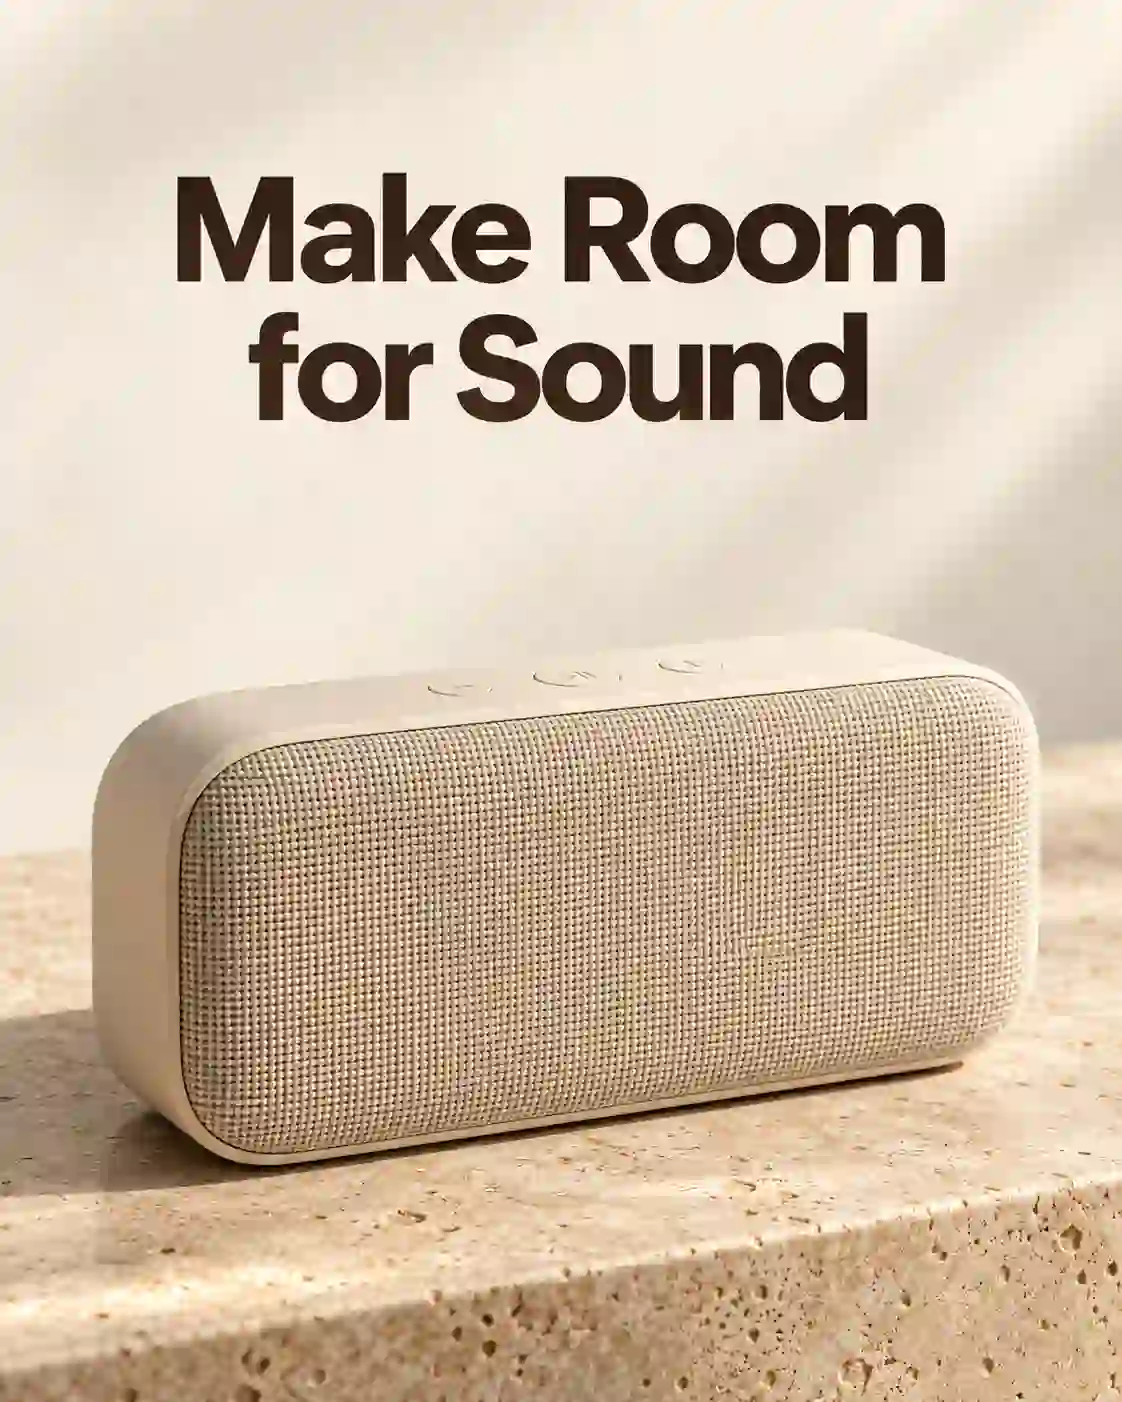
Use Nano Banana 2 for marketing images when you want to explore different looks for an announcement, social graphic, or campaign concept.
Consider Nano Banana Pro poster design workflows when the layout contains several requirements that must work together.
Explore the Direction, Then Tighten the Brief
Choose the final aspect ratio before generating.
A vertical promotion needs different spacing from a wide website banner.
Describe the product or subject, background, lighting, and intended audience.
Then specify the visual hierarchy:
what should attract attention first
where the headline belongs
which area should remain uncluttered
Keep exact wording inside quotation marks.
Example prompt:
Create a 4:5 promotional graphic for a cream-colored wireless speaker. Place the speaker in the lower half on a warm stone surface. Add “Make Room for Sound” at the top in large, clean lettering. Use soft directional light, a restrained beige palette, and no additional text.
The structure is reusable: replace the product, headline, palette, and placement to fit your campaign.
You do not need to switch models if your first choice already delivers the result you need.
Check the Design at Its Final Size
Review every word, then shrink the image to its intended display size.
Is the headline still readable?
Does the product remain recognizable?
Is the composition clear without zooming in?
For real products, compare shapes, controls, and labels with the source photo. For promotions, verify dates, prices, and offer details separately before publishing.
A successful graphic must communicate the right information as well as look appealing.
Edit Reference Images Without Losing the Main Subject
Define the change. Name what must stay.

Nano Banana image editing is useful when you already have a product shot, portrait, or visual concept and want to change a specific part of it.
Start with a clear source image. Small, blurry, or heavily obscured details give the model less reliable information to preserve.
Give Each Reference a Specific Role
When combining references, explain what each image contributes.
The product photo defines the object’s appearance.
The room photo guides the setting.
The style reference guides color and lighting.
Avoid asking every reference to control the entire image. Additional uploads are useful only when their role is clear.
Make One Focused Change at a Time
Separate background replacement from a major product redesign.
For portraits, avoid combining a new pose, different clothing, and background removal when your priority is preserving the original person.
Example prompt:
Use the uploaded speaker photo as the product reference. Replace the background with a warm, modern living room. Preserve the speaker’s shape, color, grille, controls, and viewing angle. Place it naturally on a side table with matching light and a soft contact shadow.
Compare the output with the original before making another edit. Reference images guide the result; they do not guarantee that every detail remains identical.
If an important label or facial feature changes, address that issue before continuing.
Edit an Image with Nano Banana
Build Better Starting Frames for AI Video
Design the frame for what happens next.
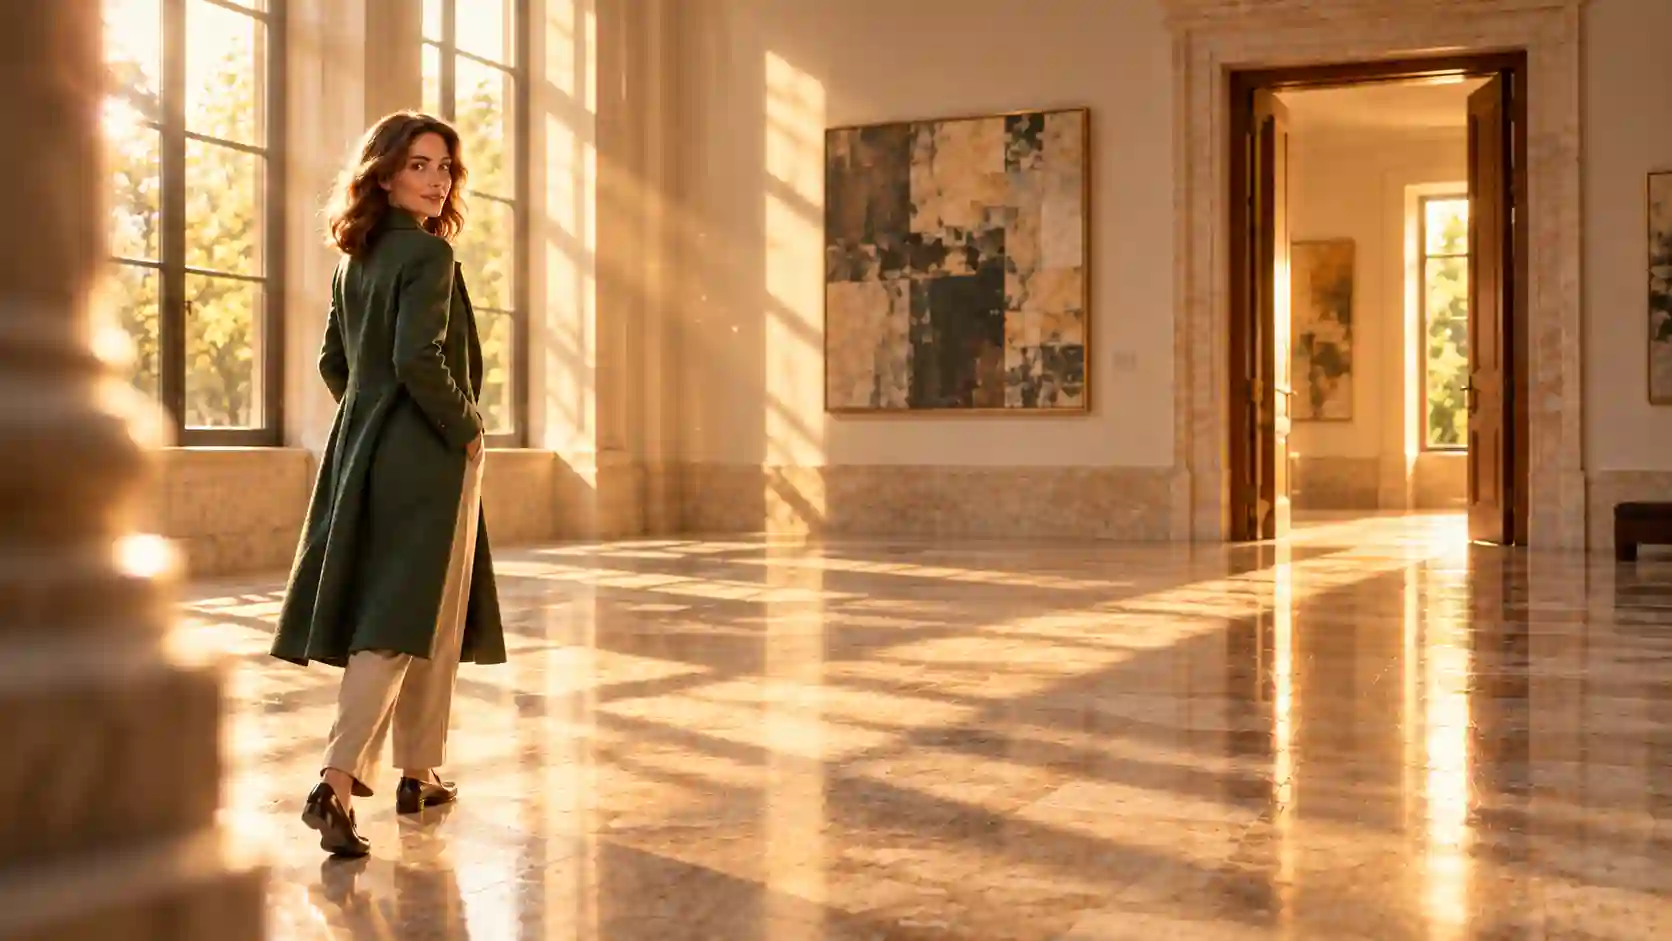
An attractive still image is not always a useful starting frame. When using Nano Banana for AI video, plan for the action that will follow.
A character who needs to walk should have space in the intended direction.
A product reveal should begin with a clear, usable view of the object.
A scene with unnecessary obstructions can make the next step harder to direct.
Prepare the image around four priorities:
Framing: Choose the aspect ratio of the intended video.
Subject clarity: Keep important body parts, products, and accessories visible.
Motion space: Leave room for the action or camera movement.
Manageable detail: Avoid dense small text that must remain accurate throughout motion.
Example prompt:
Create a cinematic 16:9 frame of a woman in a dark green coat standing inside a sunlit gallery. Show her full body, with an open doorway ahead of her on the right and clear floor space between them. Natural afternoon light, realistic proportions, and an uncluttered composition.
If you prepare both an opening and an ending frame, keep the character, clothing, and scene layout compatible.
Refine the Result Before Generating Again
Change the instruction that caused the problem.
Use these Nano Banana prompt tips to make your next attempt more deliberate.
The Text Is Wrong
Shorten the copy, place the exact wording in quotation marks, and specify its location. Remove competing text requests. Check spelling and spacing again after generation.
The References Are Competing
Reduce the reference set and assign each image a clear purpose. If the subject is correct but the style is drifting, explain which reference should control appearance and which should control styling.
Unrequested Details Have Changed
Narrow the edit. State what must remain unchanged and request one main adjustment. Review the entire result, not just the area you asked to change.
The Image Is Detailed but the Layout Is Wrong
Revise subject placement, framing, and empty space before increasing resolution. More pixels will not move a headline away from a face or create room for an action.
Take Your Finished Image into a Video Workflow
Keep the visual. Direct the movement.
PWZ also provides video generators, so the next step can be an image-to-video workflow built around your selected image.
Save the approved image, open a suitable video generator, and add it as the image input. Choose the available output settings for your project.
The video prompt should explain what changes over time. There is no need to repeat every detail already visible in the starting image.
For the gallery example:
Image direction: Establish the character, coat, doorway, lighting, and available space.
Video prompt:
The woman walks slowly toward the doorway on the right. The camera tracks gently beside her. Preserve her coat, appearance, and the gallery layout, with natural movement and consistent afternoon light.
Review the resulting action, camera movement, and subject details.
A good starting frame helps communicate the scene, but it does not guarantee a perfect video.
See the PWZ AI Video Creation Guide for image inputs, frame control, references, editing, and extension.
Start Creating in PWZ Studio
Turn a clear brief into your first image.
To use Nano Banana 2 or Nano Banana Pro on PWZ:
Open PWZ Studio and choose the image workspace.
Select the model and the available generation or editing mode.
Write your prompt and add references when needed.
Choose the available aspect ratio, resolution, and output format.
Review the credit amount shown before generating, then inspect the result.
Use the settings displayed for your selected model. Upload limits and available controls can differ between generators.
During exploration, choose a resolution that lets you judge the composition and content.
Consider higher output resolution when the direction is approved and the final placement needs it. 4K describes output size, not guaranteed correctness or consistency.
Nano Banana on PWZ FAQs
Should I Choose 1K, 2K, or 4K for My Project?
Choose according to the final placement. A smaller output can be enough for exploring a concept, while larger assets or detailed review may benefit from 2K or 4K.
Check the updated credit cost and evaluate the composition before committing to a larger output.
Can I Use an Image Created with One Model as a Reference for Another?
Yes, provided the saved image meets the receiving generator’s upload requirements.
Add it as a reference and explain what to preserve or change. This transfers a visual reference, not the previous model’s conversation or editing history.
Can I Generate Matching Visuals in Different Aspect Ratios?
You can create related versions using the same reference and a consistent brief. Specify how the layout should adapt to each format, including subject placement and space for text.
Check each version separately: changing the aspect ratio may also change details or composition.